How to Read Aurebesh: Decode Star Wars Writing Step by Step
Reading Aurebesh becomes much easier when you treat an inscription as a sequence of characters to identify, rather than a word to guess from its surroundings. A sign might obviously belong to a hangar, yet the lettering could name a particular bay, give a warning, or contain an entirely different message. The shapes must support your reading.
This guide works through that process using actual Aurebesh lettering, short decoding exercises, and a documented example from Star Wars Resistance. Keep the interactive Aurebesh alphabet open for unfamiliar glyphs; its chart supplies the individual symbol shapes and names while you concentrate on reading complete text.
First, Establish What You Are Looking At
Most ordinary Aurebesh inscriptions are read left to right, with spaces dividing words. Start by locating the beginning and end of each line. If the lettering is on a tilted panel, mentally straighten the panel before identifying symbols; a diagonal sign does not necessarily have a diagonal reading order.
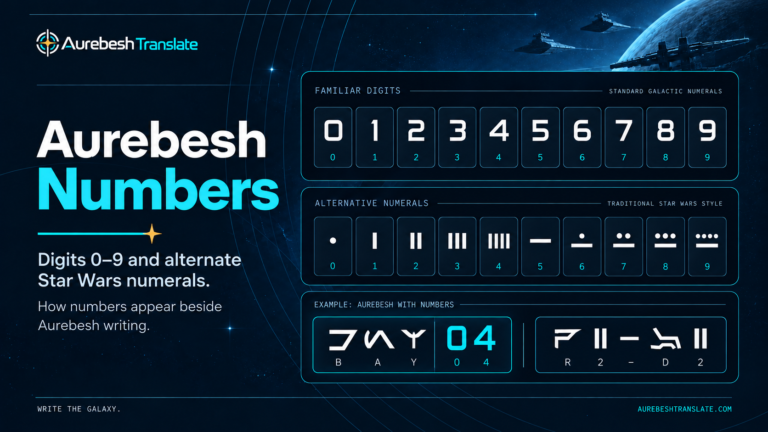
Look for spaces, line breaks, repeated marks, and separate numbers. These details often tell you more about the structure of an inscription than the setting does. For example, a final 04 may belong to a bay identifier rather than the preceding word. Do not silently remove the zero just because the number four would have the same mathematical value; an identifier’s exact characters matter.
When the source is a photograph or video still, enlarge or crop the text if possible. A shadow, reflection, or letter partly covered by another object can change the apparent outline. Record what is actually visible before filling in missing strokes.
A Reliable Method for Decoding Aurebesh
Use a two-pass reading process: transcribe the marks first, interpret the words second. It prevents an expected phrase from dictating what you think the letters must be.
- Separate the inscription into lines and word groups. Preserve visible spaces, digits, and punctuation. A dash in a technical code is not an Aurebesh letter.
- Read one glyph at a time. Compare unfamiliar shapes with the alphabet chart. Write the Latin equivalent below each one, leaving a question mark when you are unsure.
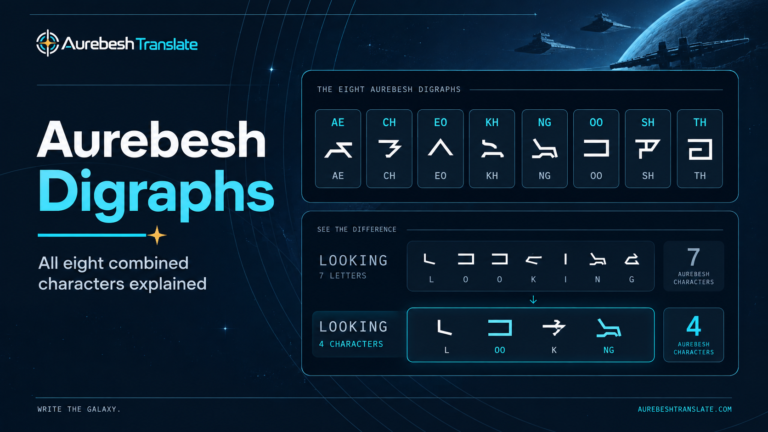
- Check for combined letters. An unusual-looking symbol may be one of the eight traditional digraphs rather than an unrecognized basic letter. Expand a combined symbol to its two Latin letters.
- Join the transcribed letters without improving the spelling. Only after you have a literal reading should you test whether the resulting words make sense.
- Recheck doubtful marks against the source. If one letter would make an obvious English word but requires a stroke that the image does not show, treat that reading as uncertain.
For a simple example, the sequence Besh · Aurek · Yirt produces B + A + Y, or BAY. If two ordinary numerals follow, the complete label might be BAY 04. Notice that the character names are only aids to identification: you do not read Besh-Aurek-Yirt as the spoken word.
Practice With Three Lines of Actual Aurebesh
The three exercises below are rendered using the site’s AurebeshTranslate Regular font. They are original practice lines, not screenshots or quotations from a Star Wars production. Try reading them with the alphabet chart before looking at the answers.
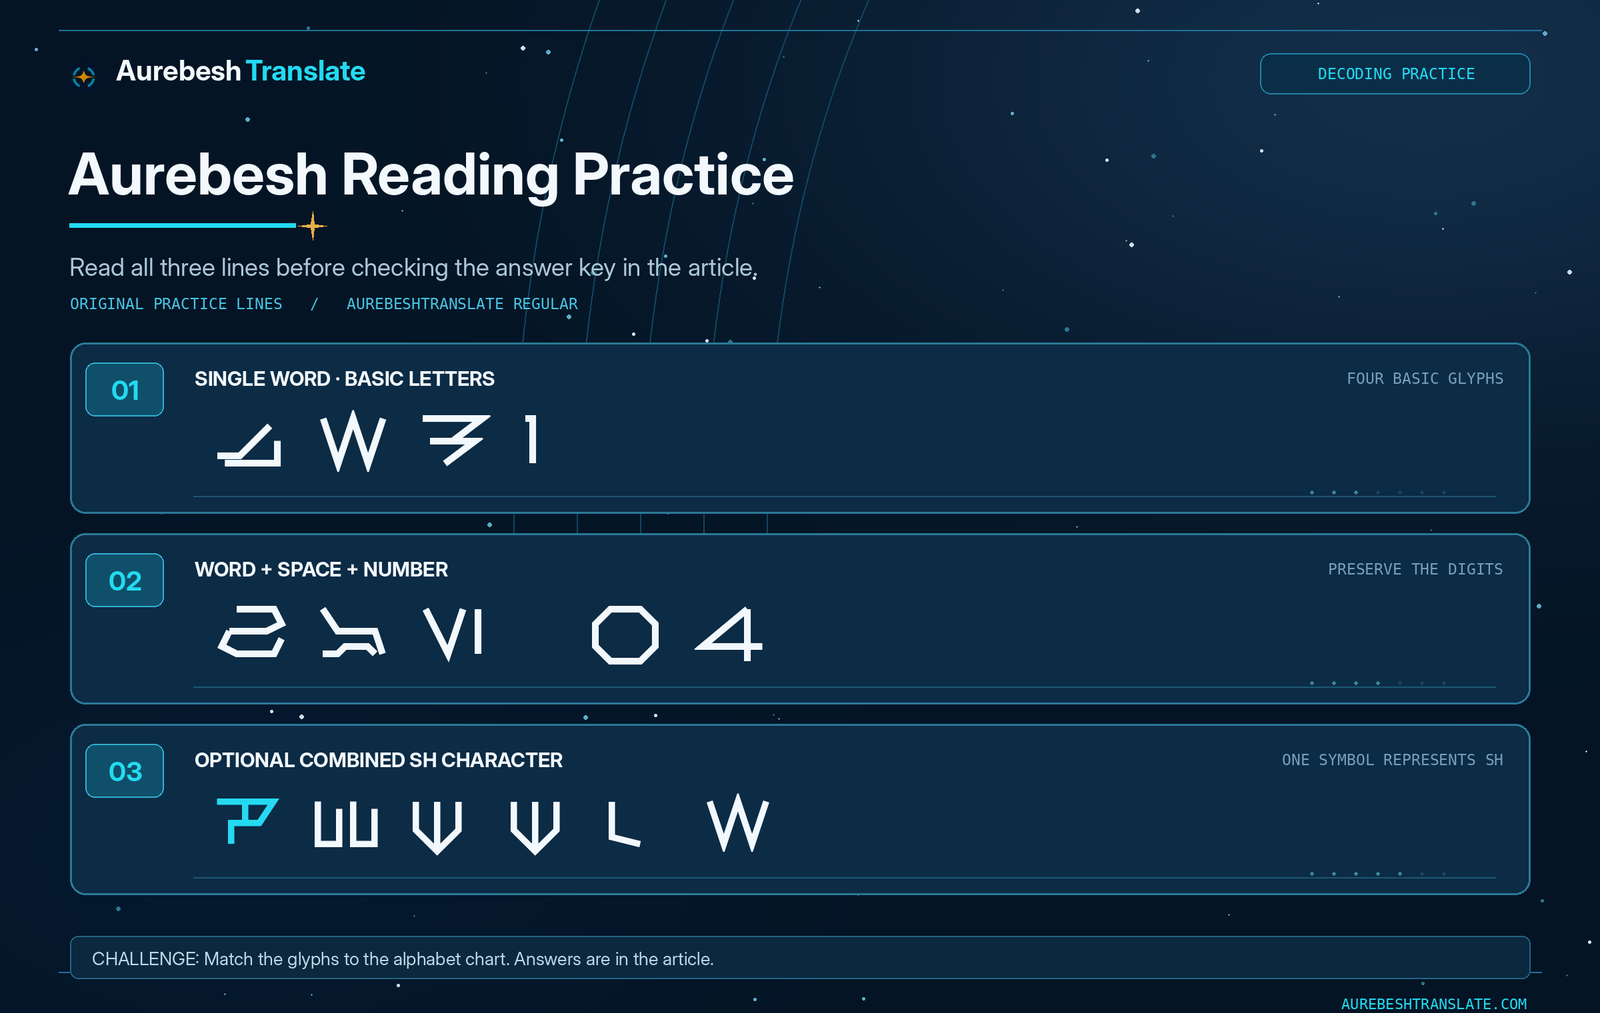
The first line uses four basic letters. The second mixes letters, a space, and numerals. The third uses a single Shen (SH) glyph at the beginning, so there are fewer visible letter glyphs than Latin letters.
Answers and What Each Line Teaches
| Line | Reading | What to check |
|---|---|---|
| 01 | JEDI | Jenth, Esk, Dorn, and Isk form four letters in order. |
| 02 | BAY 04 | The word ends before the numeral group; keep the leading zero. |
| 03 | SHUTTLE | The first glyph contributes SH, followed by U, T, T, L, and E. |
If your third answer came out as SUTTLE, the missing H probably came from treating Shen as a single Latin letter instead of a two-letter combination. That is a transcription error, not a reason to change the English word.
Read Digraphs as Two Letters, Even When You See One Symbol
The eight optional Aurebesh digraphs represent AE, CH, EO, KH, NG, OO, SH, and TH. When one appears, insert both letters into your transcription. Conversely, when a source uses two separate basic symbols for the same pair, read those two symbols normally; the combined glyph is not compulsory.
For example, a label spelling CHART might start with the single Cherek (CH) character, giving four letter glyphs for five Latin letters. A different sign could use separate Cresh (C) and Herf (H) characters and still read CHART. Neither version requires you to pronounce or spell the word differently.
This matters particularly when checking a handwritten label or a font-based inscription. A symbol count does not reliably tell you the number of Latin letters. For the historical set, edge cases, and optional usage, use the Aurebesh digraphs guide; a reader only needs to recognize and expand the pairs correctly.
Decode a Verified Warning From Star Wars Resistance
Some Aurebesh really is meant to be read on screen. In the Star Wars Resistance episode “The First Order Occupation,” an escape-pod hatch bears a warning that reads “POD DEPLOYED DO NOT OPEN.” The wording is confirmed in an official StarWars.com episode note.
To approach a warning like this, keep the groups distinct rather than reading it as one uninterrupted string. POD begins with Peth (P), Osk (O), and Dorn (D); DO begins the next instruction group with Dorn (D) and Osk (O). Seeing the repeated D and O equivalents in the same inscription provides a useful consistency check.
The warning illustrates two other habits worth adopting. First, do not infer the exact wording merely because the object is an escape pod; the symbols provide the evidence. Second, preserve what the sign actually contains. You may understand the sentence as two statements—“Pod deployed” and “Do not open”—without inventing a comma or period in a literal transcription if no such mark is visible.
When an Inscription Seems Backward or Unreadable
Check Orientation Before Reversing Anything
Some Star Wars lettering is mirrored for a display, reflection, or design effect. Individual Aurebesh characters have also been flipped in certain styles, sometimes as a way to distinguish capitals. A mirrored character and a fully reversed inscription are different problems. Do not reverse the order of an entire line simply because one glyph looks unfamiliar.
First examine the physical surface. Is it being viewed through glass, in a mirror, or from the reverse side of a sign? Then check whether all of the characters share the same reflection or whether just one letter differs. A rotated image may need turning upright; a reflected image may need flipping; a stylized single character may require neither. Try the least invasive correction that the visible evidence supports.
Use Repeated Letters to Resolve Weak Shapes
A partially hidden symbol becomes easier to check when it occurs more than once. In HANGAR, for example, both A positions should normally use the same basic Aurek shape within a consistent typeface. If one A is clear and the other is blocked by glare, the clear occurrence gives you a comparison—not permission to invent details you cannot see.
Keep uncertain characters visibly marked during transcription. H?NGAR is more honest than confidently publishing HANGAR when the second glyph has not been identified. Context may later strengthen the interpretation, but it should not erase the distinction between an observed character and a guess.
Know When Standard Aurebesh Cannot Explain the Text
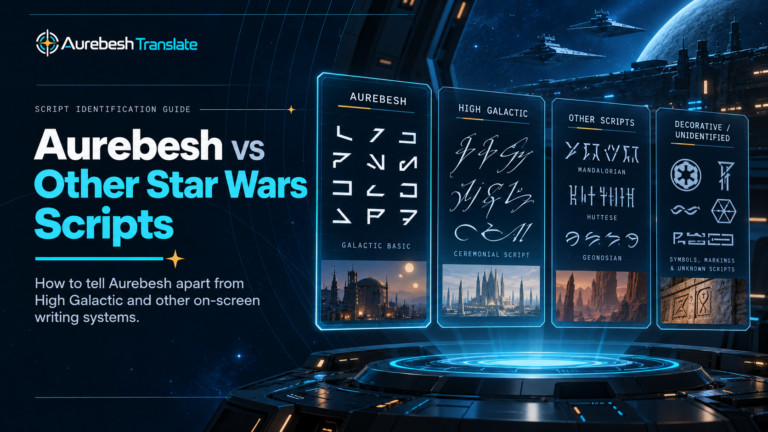
Not every angular symbol in Star Wars belongs to the standardized Aurebesh character set. Some screen graphics are decorative; other writing systems and production-specific variations also exist. The earliest film displays, for example, predate the mapped alphabet developed in the 1990s. The history of Aurebesh explains that development without assuming every earlier graphic can be decoded as a modern word.
If several consecutive signs fail to match the basic letters or digraphs, reconsider the script or the source image. Forcing the symbols into a plausible English phrase is not a successful decode.
Verify Your Reading Without Mistaking a Match for Proof
Once you have a tentative Latin transcription, compare it against the original in three ways: shape, order, and grouping. The shapes should match the reference, recurring symbols should be transcribed consistently, and the spaces and numbers should appear in the same positions as the source.
You can enter the recovered Latin text into the Aurebesh translator and compare its output with the inscription. This is especially useful for a clean example rendered in the site’s own typeface. It is a comparison method, not an image-scanning feature: the tool does not read letters directly out of a photograph, and different font designs or digraph settings can make correctly spelled text look different.
For a difficult inscription, keep a record of your confidence: confirmed for shapes you can identify, probable for partially visible but context-supported letters, and unresolved for marks without sufficient evidence. That small distinction is often the difference between a careful transcription and a convincing-looking mistake.
The goal is not to memorize all 34 symbols before attempting a sign. It is to move from individual marks to defensible words, preserving the characters that are there—even when they produce an unexpected result.